You can call me cheap, but I like to think I’m frugal 😉 Thrifty is another word that comes to mind, but it conjures up images of the thrift store (or is that just me?), and most of my decor is from home stores like Marshalls (soooo looking forward to those marked down Le Creuset in another month!), World Market, or handmade. Off topic, my favorite thing that I ever got at the thrift store was an unused high-end toaster oven for $15!!! I still get goosebumps thinking about that score. haha
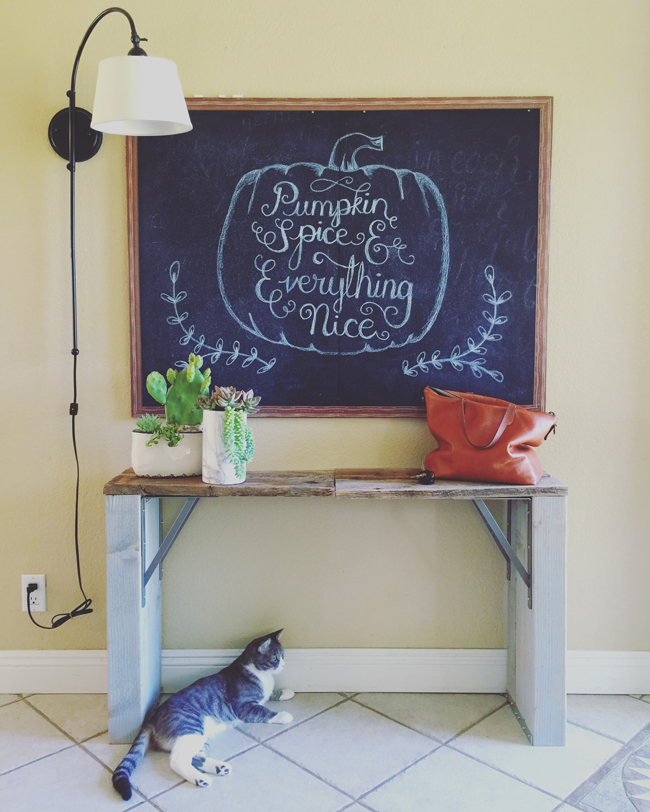
This console table, however, is handmade by yours truly. The top is reclaimed barn wood, and the legs and hardware I had got at Home Depot. It was one of those projects that you think will only take you an hour to put together. It’s such a simple design. Then it ends up taking an entire day, but it’s so worth it because it comes out just like the picture in your mind. 🙂
The console table construction is pretty obvious. I just used 6 inch Mending Plates (across the top of the legs), 10 inch Mending Plates (across the bottom of the legs), and Shelf Brackets. I left the barn wood untreated and dry-brushed the legs grey.
This huge homemade chalkboard is the real trick! A similarly sized store-bought chalkboard will cost you upwards of $100. I completed this homemade chalkboard for closer to $30! And when I had my first friend over to see it, she couldn’t believe it when I told her my secrets! 🙂

Here is what you’ll need to make this easy chalkboard yourself!
Inexpensive DIY Chalkboard
2 Elmer’s Cork Foam Boards, about $8 each
Chalk Paint $10.99
Woodgrain Duct Tape $4.64
- There are 2 secrets to this excellent chalkboard, and the first is these Cork Foam Boards. These are not only inexpensive, but they won’t warp, because they have a layer of thin cork on one side only. This cork side keeps them flat! To begin: paint the cork side with the chalk paint. I used two coats. Don’t paint the edges, we’ll get to that later.
- Once completely dry, flip them over and duct tape along the seam of the white foam side. Flip them back over. (The seam where the boards meet will be visible from the front, but only adds to the rustic character.)
- Now for secret #2: The woodgrain trim is actually duct tape! To create this illusion we’re going to miter the corners. Begin by taping the two long edges first. Wrap the tape around the edge so that it looks like it’s made of wood.
- Now for the mitered corners: Apply the tape the same way to one of the short sides, wrapping it around the edge so that it looks like real wood. The trick is to cut the corners of the tape on an angle (as seen above) so that they appear like a mitered edge. To achieve this I folded the duct tape back and drew the angled line on the sticky white side, then cut along the line. Repeat with the remaining short side.
- If you don’t tell them, neither will I 😉
NOTES:
- Chalk markers do NOT come off of homemade chalkboard surfaces. I learned this from my friend who is a professional chalk illustrator!
- The BEST chalk for this board (or any) is Butter Stix.
- To hang this homemade board I recommend nailing it into the wall on a slight angle with flat head nails. Thats how mine has been hanging and it’s great because it doesn’t move at all when I’m writing on it. I used 4 evenly spaced nails and my husband to lend me his hands. Just make sure that you use a level. 🙂
♥, Kelly


Kelly says
Awesome… Just awesome! My mind is blown! 🙂 Thank you for posting this. It’s going to be my next project!
Kelly says
Also had a question… if I use the butter stix, I assume those make the chalkboard reusable. ?
Kelly says
Yes, it washes off 🙂